*Guide* make your own corsa depo headlight
Posted: Mon May 10, 2010 7:32 pm
step one.
get two pairs of headlights (i only brought one set from a scrappy as im using the ones on my car as my 2nd set) get the 1st set and smash the glass out of them, make sure you wear eye protection and gloves while doing this!!! once done they should look something like this

step 2.
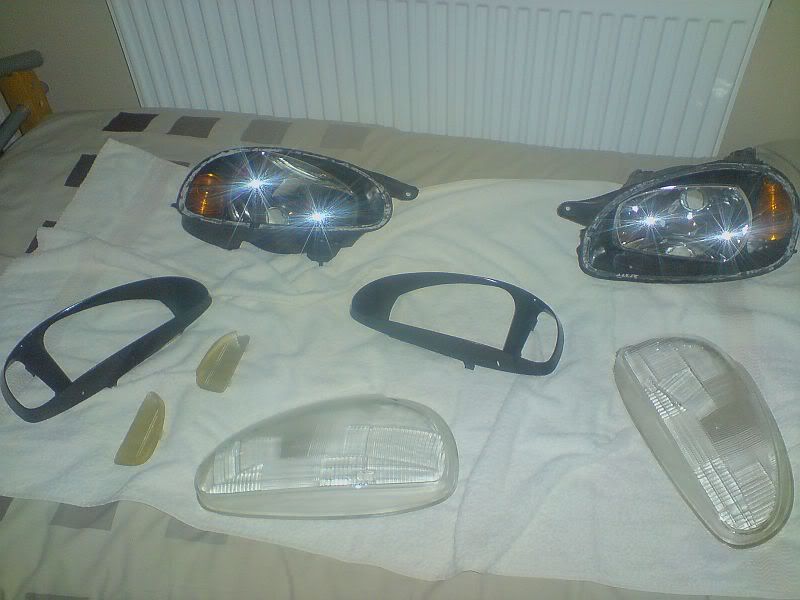
now they look like that you will need to carefully remove the stubborn glue that held the lenses in, this is a bit tedious but u dont need to worry about the smaller bits just make sure the most of it is out, i used a screwdriver that was a bit smaller than the groove the glue was in, in this pic i have already removed the surrounds that need spraying black

step 3.
once the glue is out you will find it easier to remove the surrounds, the surrouds house a clear lens for the indicator, take these out, these are optional to put back in ( i havent bothered putting mine back in) theres 3 location clips on these so watch you dont snap them off, give the surrounds a light sanding with 1200 (i didnt bother but the paint can react with the shiny stuff) and spray gloss black

step 4.
while these are drying get your 2nd set and go about taking the backs off, whatever you do you must keep the glass intact as thats the part we need, i like to heat the backs up with a heat gun about an inch or two away from the rim of the glass then get a sharp knife and cut the heated area e.g...

once this was off i was left with a plastic rim around the glass lens, i once again heated this up and carfully cut it off, it is essential you use a sharp knife, and again get most the glue off, it is vital that these sit nicely in the recess on the backs
step 5.
once the surrounds are dry, place put the indicator lens back in if you want them back in,place them into the backs of the light and make the location clips slide into the slots that are there

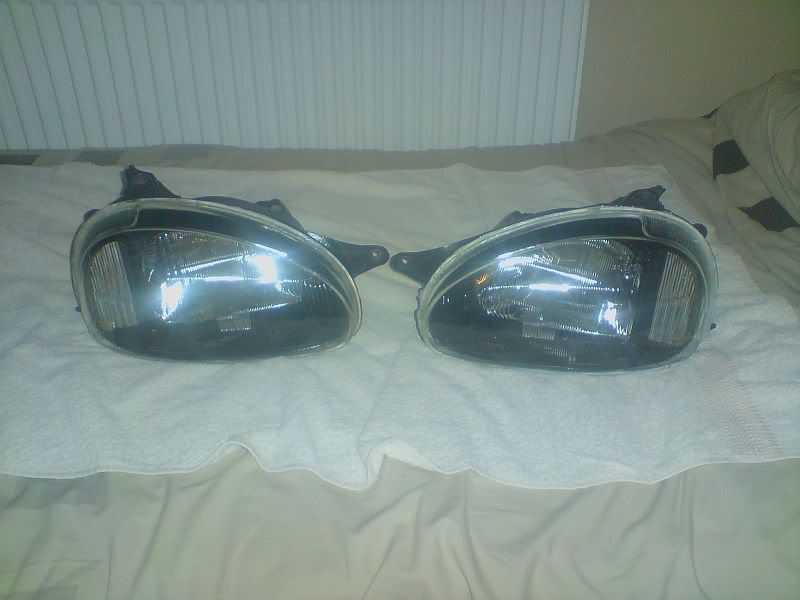
now get some silicone (i use wilkinsons kitchen and bathroom sealant the clear one) and run fill the recess where the glue was on the back of the lights, make sure you fill the recess level the put the lens back on, these will need to be taped together for the sealant to set, leave taped together for 24-48 hours in a dry well ventilated place, make sure all bulbs are out so theres a free flow of air into the light, heres my finished product


get two pairs of headlights (i only brought one set from a scrappy as im using the ones on my car as my 2nd set) get the 1st set and smash the glass out of them, make sure you wear eye protection and gloves while doing this!!! once done they should look something like this

step 2.
now they look like that you will need to carefully remove the stubborn glue that held the lenses in, this is a bit tedious but u dont need to worry about the smaller bits just make sure the most of it is out, i used a screwdriver that was a bit smaller than the groove the glue was in, in this pic i have already removed the surrounds that need spraying black

step 3.
once the glue is out you will find it easier to remove the surrounds, the surrouds house a clear lens for the indicator, take these out, these are optional to put back in ( i havent bothered putting mine back in) theres 3 location clips on these so watch you dont snap them off, give the surrounds a light sanding with 1200 (i didnt bother but the paint can react with the shiny stuff) and spray gloss black

step 4.
while these are drying get your 2nd set and go about taking the backs off, whatever you do you must keep the glass intact as thats the part we need, i like to heat the backs up with a heat gun about an inch or two away from the rim of the glass then get a sharp knife and cut the heated area e.g...

once this was off i was left with a plastic rim around the glass lens, i once again heated this up and carfully cut it off, it is essential you use a sharp knife, and again get most the glue off, it is vital that these sit nicely in the recess on the backs
step 5.
once the surrounds are dry, place put the indicator lens back in if you want them back in,place them into the backs of the light and make the location clips slide into the slots that are there

now get some silicone (i use wilkinsons kitchen and bathroom sealant the clear one) and run fill the recess where the glue was on the back of the lights, make sure you fill the recess level the put the lens back on, these will need to be taped together for the sealant to set, leave taped together for 24-48 hours in a dry well ventilated place, make sure all bulbs are out so theres a free flow of air into the light, heres my finished product


